Disclaimer:
I don't claim to be an expert cook. Or a fancy cook. In fact, I never used to really enjoy cooking. So this is mostly about low fuss, filling and tasty meals, and really just anything I have a go at and decide to share along the way!! My top priority is avoiding additives and preservatives wherever possible closely followed by using whole/less processed/healthier ingredients. But for those who would like conventional options that are quick tasty and cost effective, I would like to share tips on all of these as well!!

Saturday 13 October 2012

Spelt Banana Bread

I have been wanting to find a yummy healthy banana bread for ages that I didn't feel bad about eating for breakfast or morning tea.  I think this is yummy, however I have only done it once so may need to test again and tweak the recipe if required!  But seriously it was really nice and healthy.

I like to try to use spelt flour wherever possible instead of normal refined white wheat flour.  It is better for you and your body digests it a lot easier.  It is a lot more readily available now too, because more people are looking for the healthier options.  Check in the Health food aisles in bigger supermarkets or health food shops.

I always like it when I have a good dairy free recipe too.  I added oats in because they fill you up more and are good for helping with cholestrol (family history of high cholestrol).  Oh and they are cheap!! That helps!  I used PURE maple syrup as the sweetener, again, better for you!

This is not very sweet so you could add a little more sweetener if needed, but is YUMMY fresh or toasted with just a bit of butter on top (if you aren't worried about the dairy or cholesterol!!!!)

It also makes just a smallish loaf.


So here goes!

Ingredients:

45g Coconut oil (could use other flavourless oil)
45g Pure Maple Syrup
3 Very Ripe Bananas
1 teaspoon vanilla
170g Spelt flour
25g dessicated Coconut (without preservatives if you can find it)
1/2 teaspoon Ground Cinnamon
1 1/2 teaspoons Bicarb Soda
1 Egg
small pinch salt
30g Wholegrain Oats (could use walnuts or whatever you like instead!)

Method:

Preheat oven to 180C

1.  Add broken up bananas, coconut oil, vanilla and pure maple syrup, mash for 10 Seconds, Speed 4

2.  Add spelt flour, bicarb soda, cinnamon, coconut, oats, salt, and egg, mix for 15 Seconds, Reverse + Speed 4 (or until combined).

3.  Pour into small loaf pan and bake for 45 minutes at 180C (or until skewer comes out clean).  Don't overcook and dry out!

How easy is that!!!  Yummy breakfast on the go option!

Tuesday 25 September 2012

Yummy creamy Sundried tomato chicken pasta

We are finally settling into life in the US!  I am gradually getting to know where I can find certain foods.  I just found the Asian Market for the first time yesterday, so we finally enjoyed a DELICIOUS homemade green curry and it was wonderful!  I had been looking for chillies, lemongrass and kaffir lime leaves everywhere and couldn't find them!

But here is a post about another yummy recipe!

This is a dish that my sister in law found.  It's delicious and really easy.  Although I increased the quantities and changed the steps to make it even easier and quicker!

The recipe is from the recipecommunity and can be found here: http://www.recipecommunity.com.au/recipes/sundried-tomatochicken-and-linguini-cream-sauce/30603

I have included my steps below.  However I used 650g chicken thighs.  You could use breast, but when you sautée breasts by themselves (instead of steaming as in the recipe), I find they do break down a little sometimes.  I also added frozen green prawns because I was making this for a larger group of people (4 adults, 3 children).  And I like prawns!  I think I cooked around 400g pasta or more.  But we did have leftovers.

I was running short on time so I cooked the pasta on the stove while I got this dish going in the Thermomix.

Grate cubed Parmesan 10 seconds, speed 9 and set aside.

1.  Chop garlic, 3 seconds Speed 8
2. Chop spring onions, basil and sundried tomatoes 3 seconds, Speed 8.
3. Add oil, sautée 2 minutes 100C Speed soft.
4.  Add  650g cubed chicken.  Cook 5 minutes, Reverse + Speed 1 at 100C.
5.  Add 200g (add more if desired) frozen green prawns.  Cook 3 minutes, Reverse + speed 1 at 100C. It might need more or less time, make sure they are close to cooked, you will be cooking a little more in next step too.
6.  Add water, white wine (if using), cream and stock, cook 7 minutes, Reverse + Speed 1 at 90C.  It's still yummy without the wine!

Serve in your beautiful oval 2.5l Thermoserver (if you're lucky enough to have one ;) over linguine pasta.


Have you heard the special promotion if you or anyone you know is interested in becoming a consultant in Australia?  For October you can start your own business with your Thermomix, or even try to earn your Thermomix for free  (or discounted if you don't have one yet), by signing up for 60 days and selling 3 to qualify for a FREE 2.2l round Thermoserver and FREE 2.5l oval Thermoserver!  That's on top of your commission and any monthly incentive!  This is the first time there has ever been an extra incentive for signing up, so let me know if you would like any more information!  I am naturally not a salesperson at all, I never even worked in retail, but I love the Thermomix so much I find it easy to show others and share my passion!!  This is a limited time offer, so best to get the info as soon as you can so you can make a decision!  It doesn't matter where you live, just let me know if you would like to look into it.  Email mixingituptm31@hotmail.com.

Enjoy!


Friday 31 August 2012

Missing in action

Hi all!

Just a quick note for those that don't know, we moved to America as of 2 weeks ago, so life has been a little hectic!  We were packing up getting ready for the move, and until now, have been living in hotels since we arrived!

Currently we have just been approved for a house to rent while we are here for the next 9 months, so hopefully we will be in and settled very soon!

We are eating the terrible American take out food, and feeling very poorly for it!  I already have a Thermomix waiting for me to use, so I am busting to buy some fresh food and cook and detox and hopefully feel better quickly!!

I have already made some exciting food discoveries here in California, so am looking forward to sharing them and getting back into preparing quick and easy meals and snacks and posting more recipes!

Thank you for your patience!!

Tuesday 24 July 2012

Can you really call it Apple Crumble?

I know lots of people who are on a low fat diet.  Some of those people are in my family.  And I keep feeling bad even using good fats because oil, fat and butter are in a lot of foods.  And high cholesterol runs in the family.

Anyway, so I was looking for a nice apple crumble recipe, MINUS the butter and refined flours.  Because I do enjoy a nice warm apple crumble on a winter's night.  And I don't want to feel guilty about it!

So I came up with this little combination and thought it was really yummy.  I mean, you have to remove yourself from the expectation of cakey or floury and buttery crumble.  But yummy cinnamon apples and sweet nutty crumble!

Apple filling:

Ingredients
Approx 450g apple slices - 3 large apples or 4 smaller apples, peeled and in slices.  I used Granny Smith
1/2 tsp ground cinnamon
Approx 100g water

Preheat oven to 160C
1. Place apples in Thermomix, sprinkle with cinnamon and add water.  Cook for 10 minutes, 90C Reverse + Speed 2.  Add another 2 minutes if they need to soften more.
2. Once the apples are cooked you have 2 options.  You can drain the excess liquid, or leave it in.  Then chop apples to desired consistency - around 4 seconds about Speed 3 will come to the following pic.  But it depends on how cooked they are, thickness of slices etc, and if you like more pureed then bump up the speed and add some extra time - watch through lid until you are happy.  Add to oven proof dish (this just makes about 6 servings)

Clean out bowl and start "crumble"

Ingredients:
30g almonds
80g walnuts (pecans could work if preferred)
20g desiccated coconut
40g oats (leave out for gluten free)
10g rapadura
50g raw honey

Method
1.  Chop almonds for 2 short seconds Speed 5
2.  Add walnuts.   Chop another 2 seconds Speed 5.  Check consistency and chop a second or 2 longer if a finer crumble is desired.
3.  Add coconut, rapadura, oats and drizzle honey evenly around the top of ingredients.  Combine for about 20 Seconds, Reverse + Speed 3.
4.  Add crumble to top of apples.
Cook in oven for about 15 - 20 minutes until gently browning.  Serve with Dairy Free Custard for dairy free or ice cream! Yummy!

Tips!
1.  This really is a "do it how you like it recipe" (if that wasn't obvious!)
2.  This is not very sweet to the sweet tooth, so add more sugar or honey if you like it sweet - I kept it down for health conscious :)
3.  You could probably add other stuff in, but also could leave out oats and add some more coconut for gluten free too.
4.  Would I sound weird if I said I would eat this with some milk for breakfast??!!

Tuesday 17 July 2012

Spaghetti Bolognaise... or not?

I quickly made up this recipe tonight.  I have never actually made the bolognaise out of the Everyday Cookbook (shame on me), I guess I'm just not typically a bolognaise girl.  I have heard some say they don't LOVE the version in the EDC... but tonight I had planned to make Shepherd's Pie but realised my cookbook with the recipe in it was in hubby's car.  SO!  I decided to make an easy, tasty and filling merge of bolognaise and Shepherd's pie mince!  And I think it was really tasty!  It is definitely NOT traditional bolognaise, it really is just a mish-mash of everything.  Here 'tis:


Ingredients
350g lamb (I found the stirfry strips on special)
300g beef, cut into 2cm pieces (rump, casserole, chuck, whatever preferred for mincing)
400g Organic tin diced tomatoes
2 tablespoons tomato paste
1 tablespoon TM Vege Stock
2 cloves garlic
1 onion 
1 carrot
20g oil
150g frozen peas and corn (optional, or more if wanted!)
60-70g water (if adding frozen veggies... just add what you think it needs!) 


1.  Make mince from lamb pieces (Press Turbo button 3 or 4 times, 1 second each, checking texture - don't "over mince"! Set aside  

2.  Make mince from beef pieces and set aside

3.  Chop onion, carrot and garlic, 4 seconds Speed 6. Add oil, saute 3 minutes, 100C, Speed Soft

4.  Add mince. Saute 6 minutes, 100C, Reverse + Speed Soft.

5.  Add tomatoes, paste, and stock. Cook 15 minutes, Varoma Temp,  Reverse + Speed Soft. 


Add frozen veggies and water with 5 minutes remaining. 

Serve with spaghetti (or whatever pasta you have left in the pantry! As I said, not a true bolognaise this one!)


I hope you like it!!


And topped with a very hurried iphone pic - hey, I'm doing this for the info, not the photography (that's what I'm sticking with!).


Thursday 5 July 2012

Coconut Cupcakes for everyone.. Dairy Free!

This recipe is based out of the recipe for Coconut Cupcakes in the 2012 Food Lovers Calendar - seriously yummy!!!

I thought seeing as it was almost there with the Coconut cream instead of milk etc, that I would take it one step further and remove the butter as well!  And the result was.... perfect!!

Here is the recipe:

Ingredients
320g sugar
160g coconut oil
1 tsp vanilla essence + 1 vanilla bean OR 1 tsp vanilla bean paste
240g coconut cream (or 1 can Ayam Coconut cream)
4 eggs
430g SR flour
1 tsp baking powder (homemade - in Basics section of Everday Cookbook)
Pinch Salt

Preheat oven to 180C.  Line 2 x 12 hole muffin tins with patty cases.

1.  Place sugar and vanilla bean in TM Bowl.  Mill for 15 Seconds, Speed 10
2.  Add coconut oil and mix 10 seconds on Speed 4 (my oil was solidified because of the cold and worked well!)
3.  Add remaining ingredients and mix for 20 Seconds on Speed 7 or until combined
4.  Spoon mixture into patty cases and bake for 20 - 25 minutes until golden.  Allow to cool before icing.

I did try to experiment with a dairy free frosting as well, but I also tried to lessen the recipe and it all ended in... well, a NOT great result!  And no ingredients left (a rarity!).  So a sprinkle of icing sugar it was!!!

These cupcakes were lovely and light and nicely speckled with the vanilla sugar.  You would never guess they were dairy free (and not using additive-full butter substitutes!).

Tips!
1.  Don't have your 4 and 6 year old boys helping if you don't want it to take about 45 minutes to fill the patty cases.
2.  That's it for this one - I think it would be fairly hard to wreck it!!


Thursday 28 June 2012

Going grain free, sugar free, dairy free, meat free..... Banana Blueberry Bread!

So I haven't been cooking the usual foods lately... I am doing a bit of a detox and am not allowed grains, meat, dairy, sugar, hydrogenated oils..... I don't find too much of it a challenge.. except no grains!  And no meat or chicken leaves me quite hungry all the time!  I am allowed SOME eggs, as I am not supposed to lose weight, and they help bulk up a meal a little.
Thermomix boiled eggs and steamed some potato wedges at the same time.
Do you still use a frypan? I then browned the potatoes in the oven
and sauteed chopped mushrooms, onion, zucchini, capsicum
for about 9 minutes, 100C Reverse + Speed Soft, adding some
semi-dried tomatoes near the end... was yummo! (even though it might
not look it by the pic!)

But a week in, I am starting to look for cheats way out!!  I came across a completely fruit and nut based treat here: http://www.recipecommunity.com.au/node/17448 and they are good to just have a little snack here and there.

CADA has also been good (Coconuts, Almonds, Dates and a Green Apple all turbo-ed a couple of times in the Thermomix), as well as lots of soup with the Thermomix Vege Stock!

But having a look through the Gluten Free Wheat Free Cookbook, I came across the Banana Blueberry bread.  Seeing as it was made on buckwheat flour (which is technically NOT a grain!) and mostly banana and blueberries with raw honey or pure maple syrup, and macadamia nut oil, I decided I could treat myself to this.


I found that it had a few too many blueberries in it - I would usually add less.  But the rest was good, and I ground the buckwheat myself seeing as there was some in the cupboard.


Tuesday 19 June 2012

Fast Chicken Curry and Larger families

I am often asked about the Thermomix catering for larger families. Some of the recipes in the Thermomix are based around a 4 adult serve size. But that doesn't have to be all you get out of it. Sometimes you can just add more quantity, sometimes you might serve a 3 course meal instead of 2, eg soup with bread rolls, a main and dessert. Sometimes just adding a side dish is enough. But I cook plenty of meals that easily serve 6 adults, some with leftovers too. Dishes like the Tomato Pasta with Vegetables and Feta (a dish often seen at the cooking classes and can be found in the Taste of Vegetarian cookbook), you cook the tomato sauce, add pasta (and I add a bit of extra) and steam 2 layers of veggies in the Varoma at the same time. A really super cheap, easy, nutritious filling meal that can feed a lot!

Whenever I do a rice dish, I will steam about 650g of cubed chicken in the top layer of the Varoma and veggies in the bottom. I automatically did that when I got my Thermomix because that was how chicken I used to add to my dishes, so I knew it was enough to feed us. The rice basket is deceiving also - when it is filled with cooked rice it is more than enough - up to 400g of rice is how much you can add to the basket.

The mashed potato recipe makes heaps - we don't normally eat 1kg of mashed potato so I usually lessen that for us. But here is an example for you of how you can just alter a recipe to suit a larger crowd.

Do 2 batches of something that is quick, and have all your food prepped together so you just pop the first batch in the Thermoserver while you cook the second batch.

For entertaining a larger crowd, have a couple of different dishes to serve with rice for variation and choice.  Eg, I do a Thai theme, or Indian dishes, so just 2 of each to serve with rice.  Again, the Thermoserver is ideal!

If you have kids coming, make up some homemade pizzas for them - if you use toppings that don't need cooking in advance, you can have your dough rising earlier, have all the topping chopped and ready to pop on and put in the oven 20-30 minutes before the guests arrive.  Eg, ham and pineapple, corn kernels, capsicum, mushrooms, olives, even green prawns, and just use some tomato paste for the base and a generous sprinkling of cheese.

We almost always just add more quantities than the recipes whenever they ask for meat, chicken, prawns etc etc.  Just make sure if it is mincing, that you do 2 batches to stay under the processing weight suggestions in the front of your Everyday cookbook so you don't overload the blades.

This is based on the Fast Chicken Curry recipe from the Everyday cookbook, made for a larger quantity, and less curry paste to make it very mildly spicy rather than quite spicy.

Ingredients

2 cloves garlic
1 onion, peeled and quartered
20g oil
50g red curry paste
2 x 270ml cans of coconut milk (Ayam brand is good and comes in 270ml cans
4 potatoes cut into bite size pieces
650g chicken (I use organic thigh pieces) diced in 2-3cm cubes
200g mixed veggies of choice (cut into small pieces - eg small broccoli florets, sliced carrots, peas whatever you like)
2 tbsp fresh coriander leaves (optional)

1. Chop garlic and onions 4 seconds speed 5
2. Add oil and curry paste, sauté 3 minutes, 100C on Speed 1
3. Add coconut milk and potatoes and cook for 10 minutes at 100C Reverse + Speed Soft
4. Add chicken and veggies, cook for 17 minutes at 100C Reverse + Speed 1 (add longer if need to cook through a bit more)

Can add coriander with 3 minutes remaining.

Pour into Thermoserver (you could add a small amount of baby peas into Thermoserver also and stir through curry)

Cook rice as in Everyday Cookbook

More than you would normally add, but it cooked down
into the sauce and was fine - see notes 1 and 2
Notes about this recipe:
1. I pushed the Thermomix to it's max - the veggies when first added, sat above the max line in the bowl. By the time it was all cooked, it was sitting a tiny bit over the line.

2. Because I put so much more food in, I increased the speed to speed 1 rather than speed soft because it was struggling to stir it consistently at speed soft.

3. Add more curry paste if you like spicy!

4. If you want even more food, why not steam extra veggies while your rice is cooking?

Single layer of peas defrosting in Varoma while chicken
is cooking - see note 5
5. Just to add a bit extra, I put a single layer of peas in the bottom of the Varoma to defrost during the last 17 minute cook time. This didn't cook them, it just defrosted them (because it is only cooking at 100C not Varoma temp). I then added those peas into the Thermoserver with the rest of the curry while the rice is cooking, and that is enough to cook them gently.
I really have resorted to quick and easy pics on the iPhone
and I know they aren't great, but better than nothing!
Curry doesn't look appetising, but was yummy, easy and healthy!


So this is just an example of a yummy, quick and easy curry to feed a larger family!

Sunday 10 June 2012

Pull aparts and pizza breads

I'm going to set aside my dairy free and low gluten efforts for the sake of this post for those that don't need dairy or gluten free! Just a quick post about pull apart breads and how handy it is to be able to throw together an amazing side dish for guests or just a tasty snack or easy lunch for the kids!

I had these posted in an old post, but thought I would update with other options...
Pullapart ready for baking!
This pull apart was done using the 1.5 times bread dough quantity using the recipe found here: http://www.recipecommunity.com.au/recipes/herb-and-garlic-pull-apart-bread/26180 .  I used the same instructions for the herb and garlic, however for half of the bread, I made it into a cheese and bacon pullapart. Delicious straight out of the oven and the whole thing cost a few dollars!  You could do pesto (just make sure it is in the folded strips so you don't dry it out too much), sun dried tomatoes etc etc.

Hubby was hungry the other day and made a thick pizza bread using the basic bread recipe (replacing the grain with an extra 100g bakers flour) in the Everyday cookbook, let rise for approx 25 mins, kneaded a little, pressed the dough out relatively flat (about 2cm thick) then sprinkled chopped bacon and a generous serving of cheese over the top.  Put it in the oven as it was still heating to 220 degrees.   It turned out beautifully, like a cross between a pizza and a cheese and bacon bread... Just like you would buy from the bakery!
Yummy vegie pizza bread - pineapple, olives,
mushrooms, capsicum and cheese
Another option is to make thin and crispy pizza breads. Make a batch of pizza dough, rise for 30 mins, punch out and knead a couple of times, roll very thin, brush with chopped garlic covered in olive oil, sprinkle a small amount of salt over the top and bake in a preheated oven approx 215 - 220 degrees for around 15 minutes (depending how hot your oven is). Another option is to add Sundried tomatoes and olives (but watch how hot the oven is, maybe decrease if you find they are browning quickly). These breads are beautiful with soups.
Crispy garlic pizza crust ready for baking 

Use these ideas and be as creative as you like with fillings or toppings adding mushrooms, pineapple, different cheeses, turn into scrolls, pizza pockets etc etc!!

Monday 4 June 2012

Torta Caprese

I just tried the Everyday Cookbook recipe for the Torta Caprese but made it dairy free... Yum!! Even hubby said it was good and he can usually tell if I have made something gluten and dairy free and is a little.... Hesitant!!

Here is the recipe:
250 grams almonds
250 grams dark chocolate broken in pieces(use a Lindt dark chocolate with no milk solids for total dairy free)
210 grams sugar (I lessened it from 250 as in original recipe)
100 grams coconut oil (use a good quality non refined oil - generally found at good health food shops)
1 tablespoon cacao powder (or cocoa)
1 tablespoon of baking powder (make your own Witt the Thermomix)
6 eggs

 Preheat oven to 180c

 Grate chocolate for 10 seconds Speed 8. Set aside

Chop almonds for 6 seconds speed 6 (add a bit longer if chunks of almonds are too big). Add to chocolate

Place eggs, sugar, baking powder, cacao and oil into bowl, mix 20 seconds Speed 7.

Add chocolate and almonds, mix 30 seconds Speed 6.

Pour mixture into 22-24 tin lined with baking paper on bottom (I just put the whole lot in because I wasn't worried about the edges - speed and less washing supersedes neat edges for me!!).

Bake in preheated oven for approximately 1 hour. (I made 4 muffin size cakes as well - they were in the oven for about 30-35 minutes. But don't do both at the same time if you don't want you cake to flop in the middle when you take the cupcakes out!

My cake was a bit fudgey in the middle which I loved but could have cooked a little longer or maybe a tiny bit less oil. Can serve with a dairy free custard (use normal everyday cookbook recipe with rice-almond milk or other dairy free milk) either vanilla or chocolate flavor, or some strawberries!

Wednesday 16 May 2012

Meat and 3 veg families with Thermomix!

I have seen it written before that the Thermomix is not for those who just want meat and veg. Well I tend to disagree! The Thermomix just suits so many different people and you just have to adjust how you use it to suit your needs! The fact that a domestic cook can produce restaurant quality dishes so simply and with confidence, or that it can allow people that cannot cook at all, the ability to cook is amazing!! To indulge in creativity or just save time! For your health or for savings!!! It can suit everyone!

As an aside, I saw a sneaky camera shot of the Thermomix on Masterchef Australia again a couple of nights ago - it was a cooking challenge against a chef and the chef was using it!! I would guess either the lemon curd or lemon granita that he served for dessert - or both!! How great is that!!

But back to the point of this post!! Some think that you have to use the Thermomix for everything if you spend that amount of money on it. It simply isn't true- there are so many different elements you can prepare with the Thermomix, but you are still ALLOWED to use traditional methods if you choose for certain dishes!! You will still use the Thermomix everyday for something... And say for example a dishwasher... You don't think too much about spending $1000 -$2000 for a dishwasher. Yet mine only gets used once or twice a week. It doesn't improve my health, save me time on food prep or save money on my grocery bill!! And I definitely don't use it multiple times a day like I use the Thermomix.  Some people might see it as an extra appliance that is unnecessary - but I think more and more, it will become just another staple in your kitchen, like your dishwasher, fridge and microwave.  And you can sell the rest of your small appliance! So there's a little comparison for you on cost of appliances and use and benefits!

Anyway, back to the point again.. take the other night for example... One of the few nights I didn't use the Thermomix for our whole dinner. I felt like a "surf and turf"!!! We don't usually eat whole steak that much, we usually mince it. So I used the frypan to cook our steak and prawns, while the Thermomix was busy preparing our perfectly smooth mashed potato and steaming our vegies at the same time! Energy saving and I didn't even pay attention to it once I set the timer - it was taking care of it all for me!! I also did not have to get out a colander or a masher and mash it by hand - 45 seconds and the thermomix does the work for you. Apart from that, we also used the thermomix to make us a yummy mushroom sauce from scratch... Something I wouldn't have ever bothered to do before.

Yes they are frozen veggies..
Yes, the mushrooms are too chopped - hubby was in charge
of the mushroom sauce!!
Oh my goodness - did I use frozen veggies - YES!!! It was a Saturday night, we were late home and I was doing minimal food prep - you are allowed sometimes LOL!!  Hey, if it's saving you from buying takeaway, it's a good thing right!!

There you have it! A quick easy meat and veg dinner that still saves time, energy (yours and the power company's!!) and dishes!!!  And seriously delicious.... Again, a pleasure to work with the Thermomix in the kitchen!

PS.  I had already made breakfast in Thermomix, fresh wholegrain bread rolls for lunch in Thermomix (just before we went out for a big walk), juice, smoothies, and dessert that day as well.... and we had a busy weekend day!

TIPS!
Mashed Potato -
1. If you want to steam veggies at the same time, you need to cook your mashed potato at Varoma temperature instead of 100 degrees as stated in your cookbook.  If you use all full cream milk, you will burn the milk because of the fat content and it will stick to the bottom of the bowl - you must use at least half water to prevent this.  If you are using a rice milk etc, it should be fine anyway.  Varoma Temp for 20 - 25 will also break down the potatoes altogether.  I don't mind because once I whip it, there's no difference - it simply gives the convenience of being able to steam your veggies at the same time.
2.  I don't bother adding parmesan cheese, some people find it too "gluey".  So just add some salt.
3.  You can easily use a little oil to make it dairy free (with rice milk/alternate milk) instead of butter, and just make sure you add a little salt for flavour.
4.  If you find it too runny for your liking, just lessen the liquid content a little - I don't even measure now, I just use the amount of potatoes I would usually use for our family and then go by "eye" as to how much milk I add - somehow I get it right!

Wednesday 9 May 2012

Dani Valent "In The Mix" Cooking Class

Dani Valent came to Newcastle today and did a cooking class based on some of her recipes from "In The Mix".

Have you downloaded the App?  It has some great videos and a selection of recipes for free!  How to temper chocolate perfectly, Grissini and more!

So today she ran through so many different aspects, I left the class so excited!  Excited that I, a simple stay at home mum - basic cook, could reproduce these stunning dishes and elements of dishes of a gourmet standard quickly, simply and easily with a Thermomix.

Making Chlorophyll paste
She did some things out of the cookbook I had not even really looked at long enough to realise what I could do with them.  For example, the Chlorophyll Paste - what a fantastic addition to your Green Smoothie (also in the cookbook) that just packs a stack of nutrients into a concentrated paste!

Beef Stir fry - Yum!  And so quick and easy and the beef was steamed while the rice was cooking for 20 minutes.  People often ask about steamed steak, well this was beautiful!  And then add your stir-fried veggies (takes around 6 minutes to cook in the bowl).

Beef Stirfy to feed a crowd! From marinade to rice, omelette and
stir-fried veggies, everything was done in the Thermomix
Kuzu Gnocchi with Parsley oil and Pea Soup.

Making the Kuzu Gnocchi in an ice bath

And lots more - in just 2 hours!!

I just came away continually amazed at the absolute variety of things you can do with a Thermomix.  It doesn't matter whether you love it for Health, Sweet Treats, Gourmet Cooking, Saving Time, or because you want to avoid cooking, the Thermomix really does fit for all of those categories!!

Don't forget if you would like to take advantage of hosting a Varoma demonstration this month and the bonus offers that go along with that, please let me know.

But also, 12 Months Interest Free is a great opportunity for people who prefer to have a payment plan rather than an upfront payment.  If you have questions about this, please contact me also.

For those who already own a Thermomix and are interested in purchasing "In the Mix", you can purchase through your consultant or online at www.thermomix.com.au.

So go and continue discovering the potential of what the Thermomix can do!!!


Sunday 29 April 2012

Thermomix Homemade Lemonade

I absolutely love that when I entertain guests, it is so quick, easy and simple to provide them with all elements of a meal/afternoon tea that are homemade.

Even just for ourselves, if we want something not quite as healthy as a freshly made juice, but a "treat"that still uses whole fresh ingredients!

Make Icing Sugar, Grind Ice, add whole lemons
with ends chopped off and cut in quarters

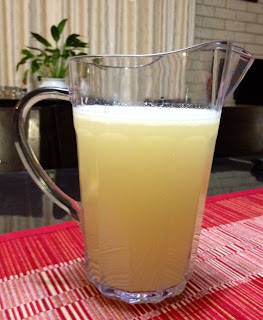
 Homemade lemonade.  It is awesome.  If you have a tray of ice cubes, 1 litre of water (or sparkling water, which I like because it makes it more like a real "soft drink"!!!), 100grams of raw sugar and 2 lemons, then in a couple of mins, you have freshly homemade lemonade and have also cleaned up!


Add half the water, Press turbo button a few times

First, you make icing sugar from raw sugar - you see this at the home demonstration.  The great thing about being about to do this is: 
1. You only buy 1 type of sugar instead of caster, icing sugar and normal sugar - if you run out, you just make some!
2.  Lots of icing sugars actually have anti-caking agents in them - e.g. a problem for people with things like Coeliac
3.  You actually get at least a tiny bit of nutritional value from raw sugar as it has some molasses still in it and it has been less processed than white sugar.  (If you want to go better again, I use Rapadura in a lot of things which hasn't been high heat treated or refined at all - I wouldn't use it for lemonade though the molasses flavour is a little overpowering.)
4.  You can use an Organic Raw Sugar and not pay the price for Organic Caster Sugars or Icing Sugars!
Add remaining water and strain through your rice basket!!!
I love that you actually use fresh lemons and don't even peel them!  Once strained through the rice basket, just discard the peels in the bottom and rinse bowl.  It's as quick and easy as that!
Freshly served Homemade Lemonade!
The end result is sooooo refreshing and yummy!

Tips!!!
1.  Unless you are serving straight away, remove the pips - I just poke them out with a knife.  This will stop the lemonade from turning very tart within a couple of hours.  I sometimes make some for dinner and if it isn't all used, I can save it for the next day and it's fine.  If the pips are left in, even though it is strained, they still seem to release the bitterness into it.
2.  Make a lemon/lime-ade by adding a lime as well!
3.  Make the most fresh Lemon Lime and Bitters your guests have ever had by adding your bitters into each glass!!

PS.  Sorry for iPhone pics!!

Tuesday 24 April 2012

Quick hello and Anzac Biscuits

Alright a quick post today to say I'm still here!

We have been in Sydney, and moving house so all has been a bit crazy between demos and sending my parents off overseas and a whole lot of other "stuff"!!

When getting back into a "routine", we revert back to our quick and easy favourites.  Homemade pizzas (I will do a post on these one day!), curries, Chicken and Cashew Satay with rice and veggies (courtesy of www.quirkycooking.blogspot.com - seriously delicious and all in one meal with steaming while cooking rice), I tried a new prawn curry in Travelling with Thermomix which was yummy, our regular Chili Con Carne, with lots of breakfasts, desserts, snacks and drinks made in between in the Thermomix!

We have converted my husband's yummy easy chicken pie too, so I will post the recipe of that shortly.

But as for today, in view of Anzac Day, have you tried the Anzac biscuits in the Everyday cookbook?  They are delicious and very simple, and I even cut down on the sweetness quite a bit too and they are still yummy.  For those who are dairy free, try the Vegan Anzac Biscuits - Quirky Cooking version - I have tried them too and they are also lovely.

Happy baking!

Thursday 5 April 2012

Hot Cross Buns

As we pull fresh HOT Hot Cross Buns out of the oven on Good Friday, I am so grateful again that I can provide such lovely food so easily, preservative free and with the ingredients I choose to add.  They taste soooooo good and cost a fraction of the cost of buying them, especially preservative free (even using organic sultanas).  The recipe is found in the Everyday Cookbook.


I have made a few batches now - this batch was made using dairy free and spelt flour and rapadura sugar as the sweetener.  The dough had just been kneaded and ready to rise - it looks a little different to Bakers Flour version.

Today's batch I just used rice milk instead of milk and rapadura as the sugar component.  They rose to be quite a bit bigger than these pictured and were super light and fluffy.  Been a busy morning between packing to move, and making, all in the Thermomix: Eggs for Breakfast, Loaf of bread for lunch sandwiches, Fresh butter spread from cream, Rice Milk, a birthday cake for my son's birthday tomorrow, and a batch of Hot Cross Buns!  And no I haven't been in the kitchen all morning!So easy and so fresh!  Enjoy your Easter long weekend!!!

Monday 2 April 2012

Corn Fritters

A quick and easy lunch idea.  Corn fritters with smoked salmon and salad.

These are great for kids also, and because you weigh in your ingredients, no making extra mess!

This is a basic recipe that I put together, so feel free to make it tastier by adding other grated veggies etc - these ones on their own are quite "boring" but I love them with smoked salmon and salad.

Although I have pictured them with not much salmon and just tomato and lettuce, usually I would serve them with more salmon and an avocado, red onion and tomato salad and maybe a little dressing if desired.  I am allergic to avocado but it's healthy and great for the kids!  Maybe leave out the red onion for them though!


And make them dairy free by using an alternative milk.  I made mine with spelt flour, so you may have to adjust the ratio of milk to flour slightly depending on how large your egg is and which flour you use.  You don't want them so runny that they don't hold together, but you don't want them too thick either!!!

To the bowl add:
1 egg - beat for 6 seconds on Speed 4

Add:
90g Spelt Flour
80g Milk
pinch salt
1/2 tsp Bicarb Soda

Mix for 4 seconds on Speed 4

Add:
230g corn kernels

Mix for 8 seconds (or until combined) on Reverse + Speed 2.

Then just fry in the frying pan until golden on each side.

Wednesday 28 March 2012

A Healthy Chocolate Alternative

This is a super easy recipe based on the Chocolate Alternative recipe in the Taste of Vegetarian Cookbook.  It is fantastic because it allows you to have a treat that has nothing bad in it.  And as usual, because you make it yourself, you can choose high quality ingredients - organic, preservative free etc.  And it's yummy!

I use almonds but you can use any combination of nuts.

200g almonds
250g pitted dried dates
65g desiccated coconut (mine is sulphur free - no preservatives)
20g Cacao powder or organic cocoa.
1/4 tsp Celtic sea salt or quality salt
20g raw honey (find in Health food shops or buy through co-op)
70g coconut oil (cold pressed, unrefined, again Health food shops or co-op)

Grind nuts for 8 seconds on speed 7. Set aside
Chop dates, coconut, cacao, salt and honey for 30 seconds Speed 7.
Add nuts, add coconut oil and mix for 20 seconds on speed 5, or until completely mixed. 
Press mixture into slice tin and set in refrigerator.  
Chop into squares for your chocolate fix!

This is also a dairy free chocolate option (as long as your cocoa doesn't have milk solids - check label).

Sunday 25 March 2012

Breakfast - Spelt Pancakes and juice!

For easy breakfasts with the Thermomix, we do lots of porridge, lots of steamed eggs (either sunny side up in the Varoma on baking paper, or in little cups/ moulds in Varoma) or eggs in the rice basket (instructions in Everyday Cookbook), or we do green chocolate smoothies with ground sesame seeds and linseeds, banana, baby spinach, cacao powder and ice.  Another easy option is a quick pancake mix.  And I LOVE the fact that the Thermomix has scales built in.  Really.  It makes so much difference to your food prep time, and your washing up!!!  Cooking takes a lot less effort somehow!

I have found a basic spelt, dairy free pancake recipe that I use, but I would still like to tweak it a little before posting the recipe.  But I served these with a fresh breakfast juice of orange, pineapple and carrot which was blended with ice for 2 minutes.  This breaks down the fruit and makes it more readily absorbable (is that a real word??!!!!) and all the fibre is incorporated.  Yummy, fresh and full of nutrients and vitamins for you.  Juicing in the Thermomix is all about experimenting and finding what you like.  There is some information in the Everyday Cookbook on how to go about some different options.  For our orange and spinach juice (or just orange juice) I just peel a few oranges, throw in some baby spinach, add some water, some ice and blend for about 10 seconds, leaving some "bits" in it as usually I don't like a thick blended juice as much.  Or if you would like more of a boost juice style juice, or need some sweetener in it, then follow the first part of the sorbet recipe (but lessen the sugar), but don't add the eggwhite or the second batch of ice, just add a little extra water.  You can throw in the citrus fruits peeled and whole (or a large orange I would break in half before adding it in), but if you would like to avoid the "tart" or bitter taste later after juicing, then try removing all the pips and make sure all the pith is removed.


Wednesday 21 March 2012

Extreme Brownies


Ok.  I admit.  This is not the real healthy me coming out.  But in the interests of still using the best of ingredients, I have done these using Rapadura, Cacao and Spelt flour (this makes them quite expensive to make!).  But you can use normal sugar/brown sugar, normal cocoa, and normal plain flour if you like.  But there is still dark chocolate and a decent serving of butter, so yeah, not really ticking any healthy boxes around here.  I am just trying to cover all bases for people searching for recipes ;)  Recipe found here.

So if you need to "bring a plate" or give a little thank you gift, you absolutely cannot go past these!!!  They are absolutely divine, and bring the words "these can NOT be good for me" with every bite that you take.  But you will take more.  I guarantee it.

It's a no fail recipe.  I don't do step 3 (chopping the chocolate in the bowl), too many "setting asides" for my liking!  So while you do step 4, which is melting the butter for 2-3 minutes, I just break the chocolate into squares.  Then continue on your merry way.  Quickest, easiest, yummiest brownies ever.  I don't know whether it's just my oven (ever so unreliable), but these have the best crisp top and dense moist filling.  Yum!

Yes, I had cut it while it was still warm so it broke apart (best time to eat).
Yes, I only put 4 little odd pieces on the plate.
Yes, the rest may have been eaten.
But do only make these to give away.  Or maybe as a once a year VERY special treat.  Because you can't stop at one piece....  But you will get compliments from your recipients!

Friday 16 March 2012

Shepherd's pie

I am really really enjoying the Travelling with Thermomix cookbook.   So far I have tried the Caesar Salad, Lemon Chicken and Shepherd's pie out of that cookbook and we have liked all of them.  The Lemon chicken was really nice and even cooked chicken legs in the bowl of the Thermomix, so a cost effective meat dish!

But back to Shepherd's pie!  I bought 500g of diced lamb for $8 (reduced because it was about to go past use by date!) so I didn't even need to dice it to make the mince.  Sliced mushrooms, onion, carrot, garlic, tomatoes.. then of course the mashed potato topping.  The potatoes steam in the Varoma while the mince filling is cooking in the bowl for 35 minutes after tomatoes have cooked down for 5 minutes, then you put the potatoes into the bowl and "mash".  All into the oven for 25-30 and all done.  A filling and delicious meal.  I probably spent about 15-20 minutes during that time where I was peeling and cutting potatoes, tomatoes etc, so a good one to do if you have some time early in the afternoon then leave the Thermomix to do it's role, and the oven then to finish off while you clean the kitchen/talk a walk/have a sleep!! I wish....


Thursday 15 March 2012

Pavlova

In the interest of providing a healthy balance of mains and desserts ;) here is a Thermomix pavlova.

After making ice cream etc, you may end up with leftover eggwhites.  This pavlova used about 5 smallish eggwhites.

I used a recipe from www.recipecommunity.com.au and I thought it was a lovely tasting pavlova.  I know some people like their pavlovas with varying consistencies/crunches/sponginess!!!  But we all liked this one just as it was.

You warm the eggwhites to 50C too which is fantastic if they are straight from the fridge.

The trick to using the Thermomix for eggwhites, is that your bowl, lid and lid seal, and butterfly must be very clean.  Any grease will not go down well!  And because we use the thermomix for lots of main meals with oil etc, you really need to clean it well.  You can also do a vinegar rinse which will help as well.  Doing this for the lid seal and butterfly is a very good idea!

So, with butterfly in, you beat the eggwhites.  As you gradually add the sugar, you can sit it on the lid and just slowly "push" more through hole where the MC would usually be.

Here is a picture just after I have removed the butterfly (you can see the line where it was sitting).

Then pile how you like, ready to pop in the oven

And decorate with cream (whipped in Thermomix) and fruit as desired.  You really have to watch cream in the Thermomix!  Depending how fresh the cream is, it may only take 45 seconds, so I always take the MC off after I start whipping so that I can watch the cream on the side of the bowl thicken up.

We just did this one quickly as it was part of dessert for Friday night family dinner - and it was already cut and a dodgy photo was taken with the iPhone!

A Delicious twist you can do if you only have frozen strawberries is to add other fresh fruit and make a batch of Berry Coulis from the Everyday Cookbook to be added in.  Absolutely DIVINE!!!!  Another idea is fresh berries and the Lemon Butter to drizzle over also!  Yum!

Wednesday 14 March 2012

Caesar Salad - Thermomix style!!!

To celebrate what I am sure is the last of our warm days, and the fact that this month incentive for purchasing a Thermomix is a free "Travelling with Thermomix" cookbook, I chose a recipe to try out of the cookbook.  This cookbook is not usually available for sale, so I didn't have a copy until the other night.  Flicking through, there are quite a few I would like to try and it is a really nice looking cookbook!  It features recipes from all over the world, some standard favourites.

I did make a few adjustments to the recipe as I was making it for the whole family as our dinner, so I added the chicken and bacon and cooked more eggs than the recipe asked for.

So here is the run down:

Place some eggs in the rice basket, put 500g water in the Thermomix bowl.  Steam for 13 minutes at Varoma temperature.

As soon as I put the eggs on, I started chopping my chicken.  If I had thought bit more, I would have chopped the bacon in the Thermomix for a few seconds before I started the eggs, but hence I did not.  So I quickly chopped the chicken (630g) and spread it evenly on the Varoma tray.  I then just put a few rashers in the Varoma bowl to steam.

So I probably took about 4 minutes to cut the chicken get it into the Varoma, so for the remaining time of the of the time, I started assembling the rest of my ingredients for the dressing.  Oil, anchovies, fresh lime juice, egg yolks etc etc.  I got out a salad bowl and broke up the cos lettuce to arrange in the bottom.  I also chopped some slices of bread into crouton cubes and put them under the grill for a minute or so each side (watch carefully!!!! They burn quickly)

Once the timer went off, I took the eggs out, ran them under cold water then put the chicken on for another 3-4 minutes - I actually think it was cooked already, but I am paranoid about chicken so always give it longer incase!!!  So while the chicken had another few minutes, I peeled the eggs (I did 4) and cleaned up some mess!

So once the chicken was finished, I took it off to cool for a couple of minutes while I cleaned out the bowl, then made the dressing - this took about 2 minutes, maybe a few seconds more ;)  I then sliced the eggs, pulled apart the bacon and added all of the ingredients to the salad bowl.  A drizzle of dressing and all done!

All in all, that is about what I did (I may have gotten some of the steps mismatched, but it is all about you and the Thermomix multi-tasking!!!)  But I did actually put the timer on and it took 38 minutes from getting out the first ingredients from the fridge (starting with eggs into the basket) to photographing the salad.  How great to serve a filling yummy dinner salad with freshly made dressing from scratch, including homemade bread croutons!!!


The kids and hubby all loved it, much tastier than our old bought dressing version, and usually I wouldn't have bothered with the eggs because I always lost track of time doing things on the stove, resulting in mismatched finishing times.  Hate that.  And using one appliance to cook all of the food at once (energy saving), then the dressing!  I would have usually spent the same amount of time, but nearly always burnt the bacon due to some distraction along the way (I know, I really don't sell myself as a great cook....)  I could have added a bit more bacon, another egg and more lettuce to make it go a bit further, but as it was, it was perfectly polished off with everyone satisfied!

Monday 12 March 2012

Non-fried "Fried Rice"

I love to do this quick and easy dinner when there is just absolute bare minimum food left, at the end of the fortnight and you are in a hurry to get dinner on!  This recipe comes again from Quirky Cooking so visit for a more detailed explanation!!! (thank you again!).

It's great because you can usually really on the fact that you will at least have some rice, some eggs and then whatever fresh/frozen veggies you have left and whatever meat/prawns you have (or just have it vegetarian!)

I had 1 carrot, half a broccoli, frozen peas and 3 cobs of fresh corn!!!  And some frozen green prawns that needed to be defrosted and peeled before cooking.  See, really scraping the bottom of the barrel there!

So I started the rice cooking, a large batch for 20 minutes at Varoma temp, then chopped the carrot and broccoli and threw them in the bottom of the Varoma (they were going to take the longest, so get them in first).  Then I cut the corn off the cob and added that, then the frozen peas when there was just under 10 minutes left on the timer.  I then started peeling the prawns which had been sitting in some water to defrost - this is what took the most amount of time!!

you can add more veggies than I had
- time for the grocery shopping!

When there was about 5 minutes left on the timer, I gave the veggies a quick stir around so they cooked evenly, then I lined the top tray of the Varoma with wet baking paper, whisked 4 eggs together quickly, then poured the eggs onto the paper for a steamed omelette.  When the timer was finished, I tipped the rice in with the veggies, rinsed out the bowl, added 1 glove of garlic, chopped for 3 seconds, added some oil and the prawns and sautéed on 100 degree, Reverse + Speed soft for about 4 minutes (depending on how fresh or frozen the prawns are will depend on time - just make sure the garlic has enough time to cook out a bit!)

While the prawns are cooking, just slice up the omelette with your spatula and add that to the rest!  If I hadn't spent so long peeling the prawns, I could have just added them in the Varoma also!!  Prawns are super quick to cook, even from frozen.

I just "chopped" the omelette
so it looks messy, that is my time saving!!
Add the garlic prawns and sprinkle a good dose of soy sauce over the mixture!!  Can even add some honey too, if desired.  But we just have soy and it is very nice.  Easy, very healthy and a great use of the leftover bits and pieces you have!!!  You can add as many veggies as you have - as I was down to the very last, this isn't as big a serving as you could make - it easily feed a crowd!!! Even serve with some marinated chicken pieces etc.


There you go, easy Monday night dinner on the run, and very cheap!!! And we still have leftovers, so can serve as a side dish tomorrow night!

Wednesday 7 March 2012

Thermomix Portugese Cream Tartlets

Yummmmmm.... has anyone tried the Portugese Cream Tartlets from the "My Way of Cooking" cookbook?  Or have you downloaded the app for iPhone or iPad?  It's only $8.49 and you get all of the recipes in the cookbook (which is worth $60) plus some extras, and a shopping list, menu planner, some videos... and there are some great recipes in there as well as lots of tips and variations.

Well, I was super excited today as I wanted to see if I could convert these to a dairy free version.  And guess what - delicious!!  And you would never know!

I do struggle with some things being dairy free, especially custard bases etc, as you really have to do the coconut cream option, and I get tired of everything tasting like coconut!!!  But this one, you absolutely wouldn't know if I didn't tell you.

I substituted the 250g of cream for 250 g coconut cream, and the milk I just made some rice milk before I made the custard.  I use Jo from Quirky Cooking's recipe for Rice-almond milk, but if I am just using it for baking, I just make it all on rice - even cheaper!!

So next I just need to try her spelt dairy free rough puff pastry to go with it (http://quirkycooking.blogspot.com.au/2010/11/spicy-chicken-vege-sausage-rolls-with.html).  I would have tried it today, except our house is on the market at the moment and I am really trying to limit being in the house as I can get calls for inspections any time (and I always get them when the house is looking its absolute worst!!), so less mess is best!!!

So here is a picture of the tartlets - I made some normal size and some mini... I know they don't look that great, but that is how they are supposed to look!!! Have a look at the app or cookbook!!  I promise!  But what a tasty morsel just sprinkled with cinnamon over the top!!


I will also substitute organic raw sugar and try Rapadura next time for a more non-refined sugar option and see how it goes.


EDITED to add whole recipe for those that don't have MWOC.

Ingredients:
250g Milk (dairy free alternative)
250g coconut cream (use a good quality one - the taste of cheaper options aren't great in anything!)
170g sugar
50g flour (I used spelt)
5 egg yolks
1 cinnamon stick
lemon peel of half an organic lemon
500g puff pastry, made
Sprinkling of ground cinnamon top

Insert Butterfly.

Place milk, coconut cream, sugar, flour and egg yolks into bowl, mix 10 seconds, Speed 4.

Add cinnamon stick and lemon peel, cook 18 minutes, 90c, Speed 2 + Reverse. (although I did find the cinnamon stick was in a few pieces at the end, but maybe just me!)

Preheat oven to 200c.  Roll out pastry and cut 12 circles (approx 10cm diameter) and put into greased muffin trays.

Once custard is cooked, remove and discard cinnamon stick and lemon peel.

Pour filling into pastry cups, but don't fill to the top!  Bake in preheated oven for 25 -30 minutes until custard is set and browned a little.  Cool in muffin tray for 15 minutes, add a sprinkling of ground cinnamon.
Delicious warm or cold!!!


Monday 5 March 2012

Bread

Firstly, you are not to be afraid of making bread!!  It really is soooo easy and saves a lot of money and trips to the shops for bread when you have run out!!!

For those that would like a preservative free option for a white loaf, then here it is!  I use the Basic Bread recipe in the Everyday Cookbook, but it you don't want it to be a wholegrain loaf by grinding grains to start, then simply substitute that 100g of wholegrains for 100g of Bakers Flour.  So you use 500-520g of Bakers Flour for each loaf.

Bakers Flour is not just plain flour.  It is a strong plain flour, so you won't get the same results with plain flour!  For those around the Newcastle area, Bibina sells 12.5kg bags so it is extremely cost effective, when you use it for your pizza bases, cinnamon scrolls, croissants, pull aparts, all of the different doughs you can make.  For others, it is cheaper to buy it in the 5kg bags at Coles etc.  It costs me approx 70 cents per loaf / 12 dinner rolls/ 2 large pizza bases/ etc for the flour.  Then you just add the cost of yeast and 20g olive oil and some salt!!

After speaking to a Baker, I got a lot of tips, although because I don't use a bread improver, the results are never going to be quite as good without a little bit of sugar, and bread improver - mainly for loaves.  But that's fine with me as I don't want to include those extra ingredients and I think the results are good enough.  Rolls and pullaparts you don't need to worry about that anyway as they are much more forgiving!!

Back to the basic bread.  If you want a really no fuss option, here is what to do.  If you haven't boiled the jug previously for your lukewarm water, then just weigh in you 300g of cold water or tap water, then set to heat on 37 degrees for 2 minutes Speed 2.  Then you have your warm water!  Then add your yeast and other ingredients, mix for 5 seconds on speed 6, then knead for 2 minutes.  If you want to, you can bump that time to 5 minutes and you will get a little fluffier result in the end.  

Once finished kneading, if you don't need your bowl for anything else, you can then just let rise for at least 20 minutes in the bowl, up to 30 minutes.  If you need your bowl, you can take out the dough, knead about 4 times by hand and wrap up in Thermomat, or place in oiled bowl and cover and leave for at least 20 - 30 minutes.  If you are doing rolls, they are a lot more forgiving with rising times etc than bread is.

After proving, if it is in the Thermomix bowl, knead for 30 seconds.  If it is in a bowl or Thermomat, then punch out the air, knead about 5 times by hand again.

THEN

If doing loaf:  Tip your dough straight into your loaf tin, then let rise in tin for another 30 minutes, or longer if desire, until the dough rises to the top of the tin.  Then put into the oven, set oven to 180C, letting the bread continue to rise while the oven heats up.  Then bake the bread at reached temp for time stated.  I set my oven for 45 minutes which allows it to heat up and cook, but my oven is definitely not average, so you may need to experiment with your own to know how long to cook for.  Some people let it rise fairly high then bake at a hot preheated oven up to 200C- spray with water if you want a nice browned soft crust on top.

If doing rolls:  Stretch out and break into desired amount of rolls and roll into balls - you can do about 12 small rolls or 7 large rolls.

Arrange on baking tray fairly close so they will rise and touch together.  If you have time, then let rise again for about 25 minutes covered, or keep spraying with water so the top doesn't dry out.  If you don't have time, then just place in a cold oven, set to 180C and bake for around 25 minutes, until browned on top - they will have a second rise as the oven heats up/You can put it straight into the cold oven without having the second rise, but your crust will break apart more.

These could have been placed a little closer together -
we were experimenting with different kneading times
and water temperatures, but they turned out beautifully!
If you would like a mixed grain loaf, you can just pour your seeds through the top during the last 30 seconds of kneading.

I make 2 loaves at a time, slice one and freeze it ready to use for toast or kids lunches, and use the other fresh.  I also try to mix up a batch of muffins or cake that I bake all at the same time so I am being very energy efficient!!

If you have a bit more time and would like a lighter, bakery style bread that stays fresher for longer, then try the Tang Zhong style bread here: http://www.forumthermomix.com/index.php?topic=6409.0  Read through the responses for different tips, but if you are kneading for 15 minutes, put your thermomix on the floor so you don't have to be worried about it falling off the bench, or watching like a hawk!!

Of course there are lots of other options with breads and grains, using gluten free options, or spelt flours  etc.  Pop over to www.quirkycooking.blogspot.com for all of these alternatives, she has some fantastic recipes and photos!!  Otherwise, I hope this inspires you to experiment a bit more with your breads!!